
Vegan Pumpkin Chili (Cozy And Comforting!)


Onion & Garlic: I usually go with yellow or sweet onions, but any kind will work. Combined with fresh garlic, it creates a great flavor base to start the chili.
Bell Peppers: I like to use a mix of yellow and red bell peppers. The mix of both colors gives the chili a touch of sweetness and makes it super colorful. If I only have one kind, I just double up.
Fire-Roasted Diced Tomatoes: These bring in so much flavor! I like using fire-roasted for the extra depth, but regular diced tomatoes work too.
Pumpkin Puree: This is what makes the chili extra creamy, slightly sweet, and savory at the same time. I recommend double-checking the label to make sure it’s 100% pure pumpkin, not pumpkin pie filling.
Vegetable Broth: I use this instead of water because it adds a depth of flavor that makes the chili taste like it’s been cooking all day. If I want it thicker, I use a little less broth.
Beans: I use a combination of kidney beans and black beans for a variety of colors and textures. I drain and rinse both before adding them to the pot. Sometimes I use chickpeas or white beans too, depending on what I have.
Seasonings: In addition to olive oil for sauteeing, I add in chili powder, cumin, smoked paprika, salt and pepper! Chili powders all vary in terms of their heat level, so I always taste test it before adding it into the recipe (adjusting as needed, especially if I’m making it for my kids!)
Apple Cider Vinegar: I stir this in at the end to brighten everything up and balance the sweetness from the pumpkin.
🔪 How To Make
This pumpkin chili is one of those set-it-and-simmer recipes that fills the whole kitchen with the best aromas! It’s really easy to make, especially once all the veggies are chopped. Here’s how I make it:
Saute Aromatics: I start by heating the oil (or broth if I’m going oil-free) in a large pot over medium heat. Then I add the onion, garlic, yellow bell pepper, and red bell pepper. I sauté everything for about 5 minutes, until the onion is soft and the peppers begin to cook down.
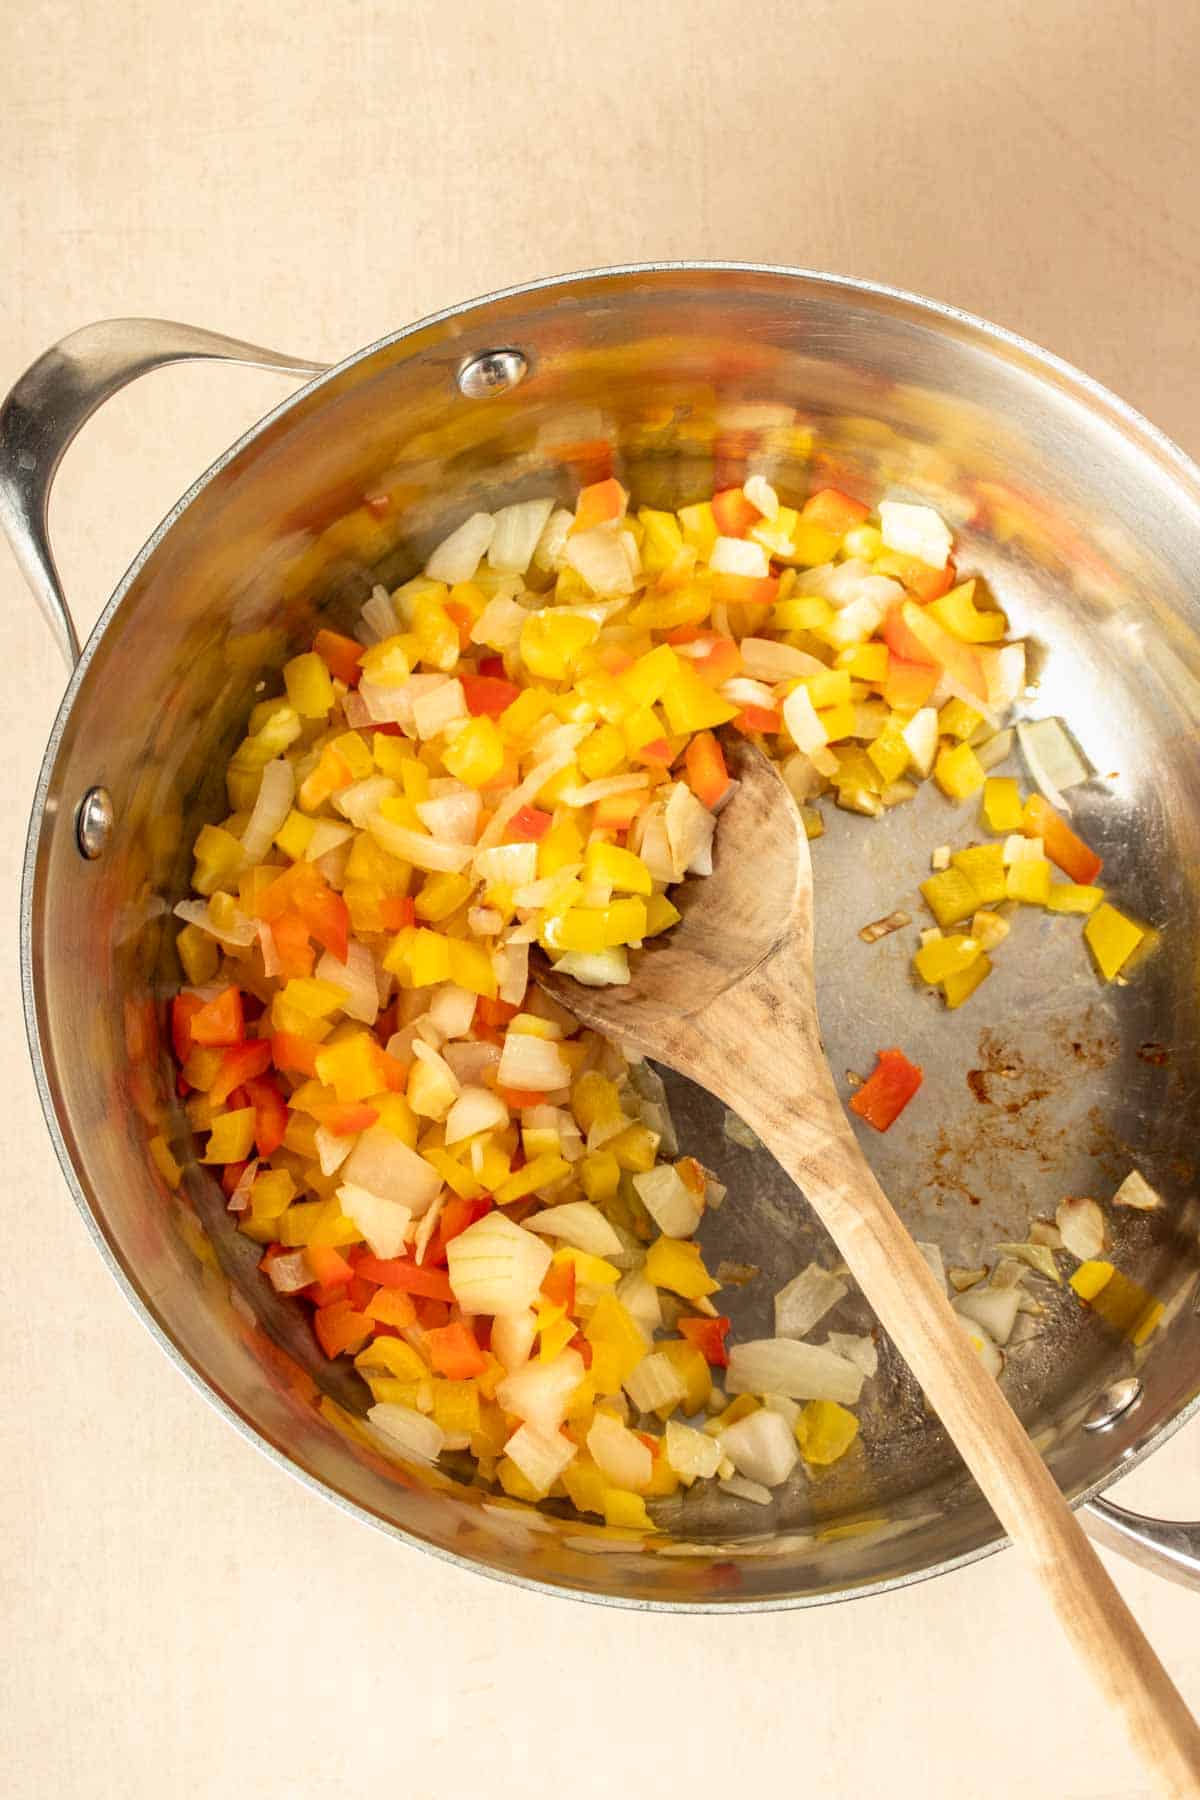
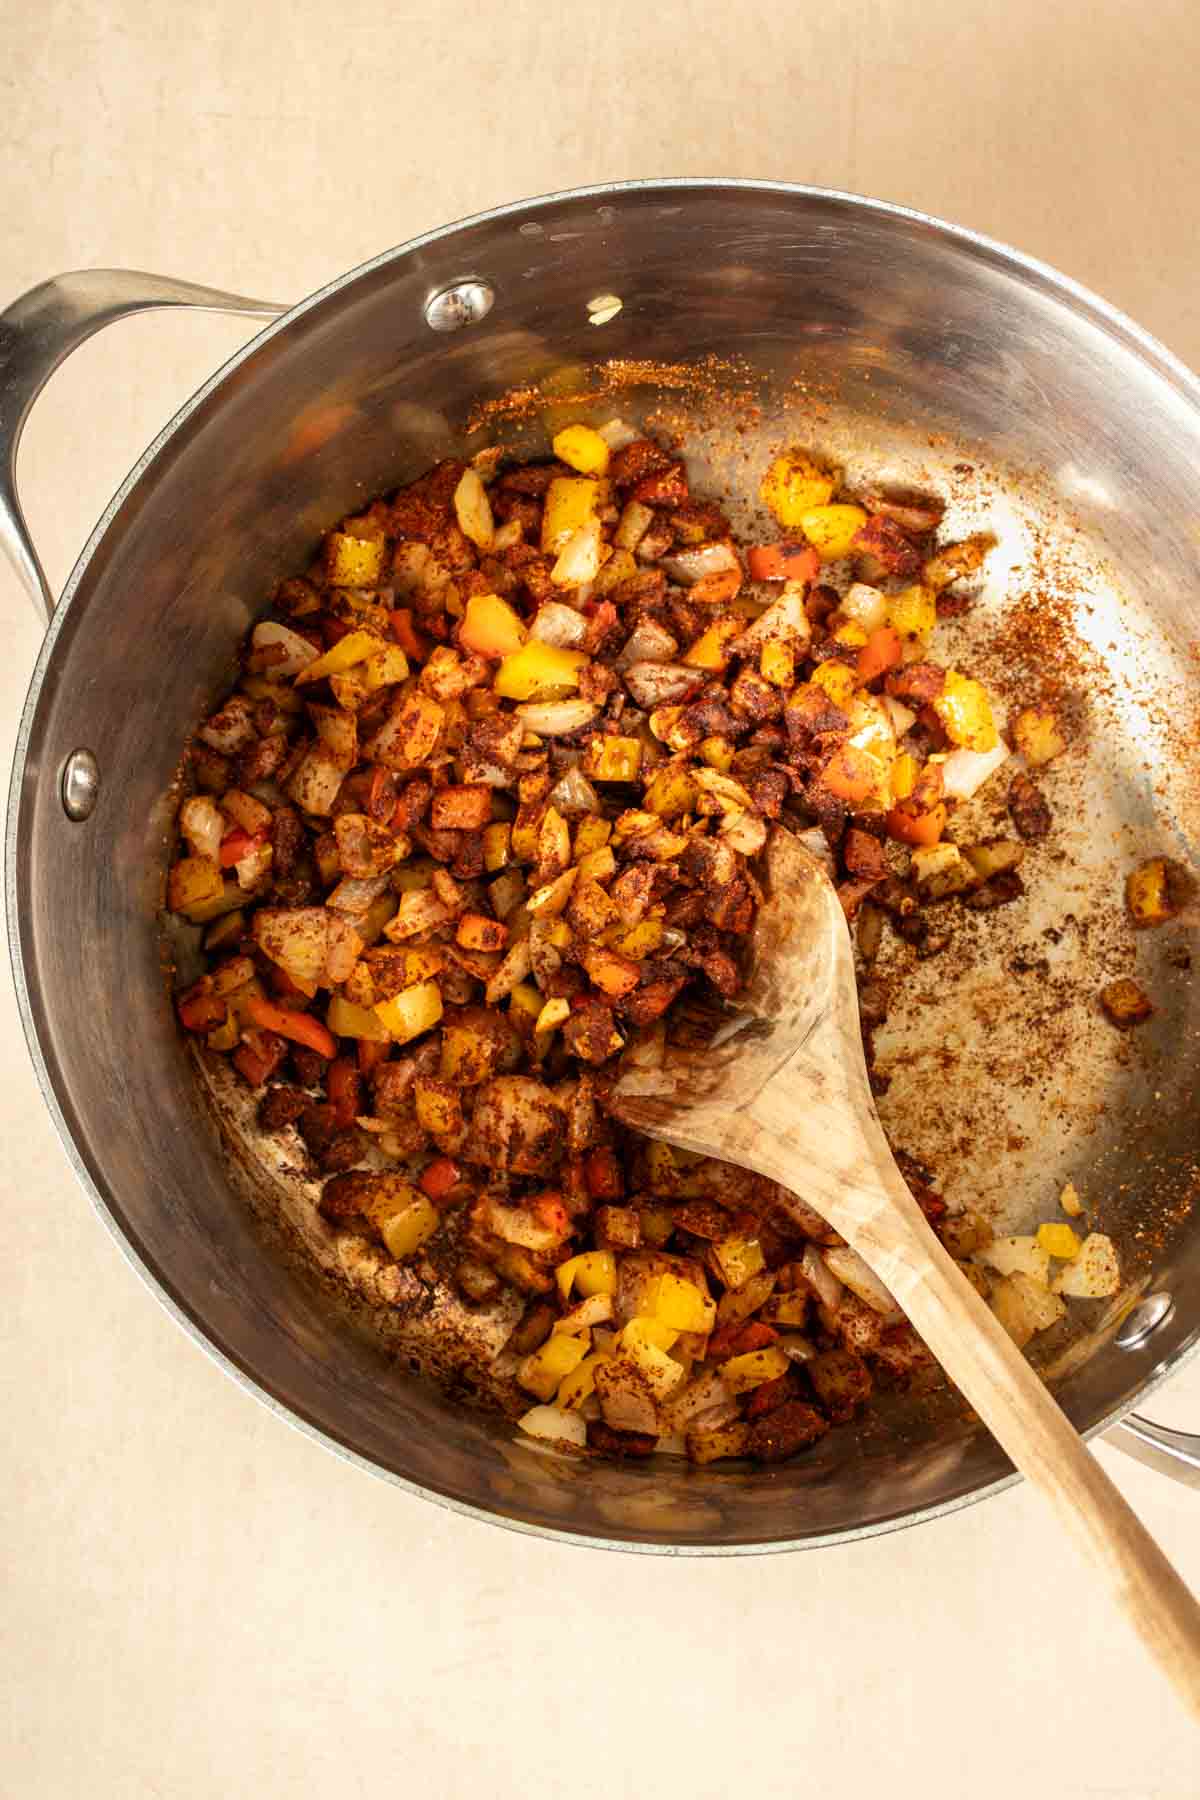
Add Spices: Next, I stir in the chili powder, cumin, smoked paprika, sea salt, and black pepper. I let the spices toast for about 1 minute, just until they smell fragrant. This helps bring out their flavor and gives the chili a richer base.
Add Remaining Ingredients: Now I add the fire-roasted tomatoes, pumpkin puree, vegetable broth, and both cans of beans. (Basically, I add in everything except for the apple cider vinegar). I stir everything together until it’s well combined.
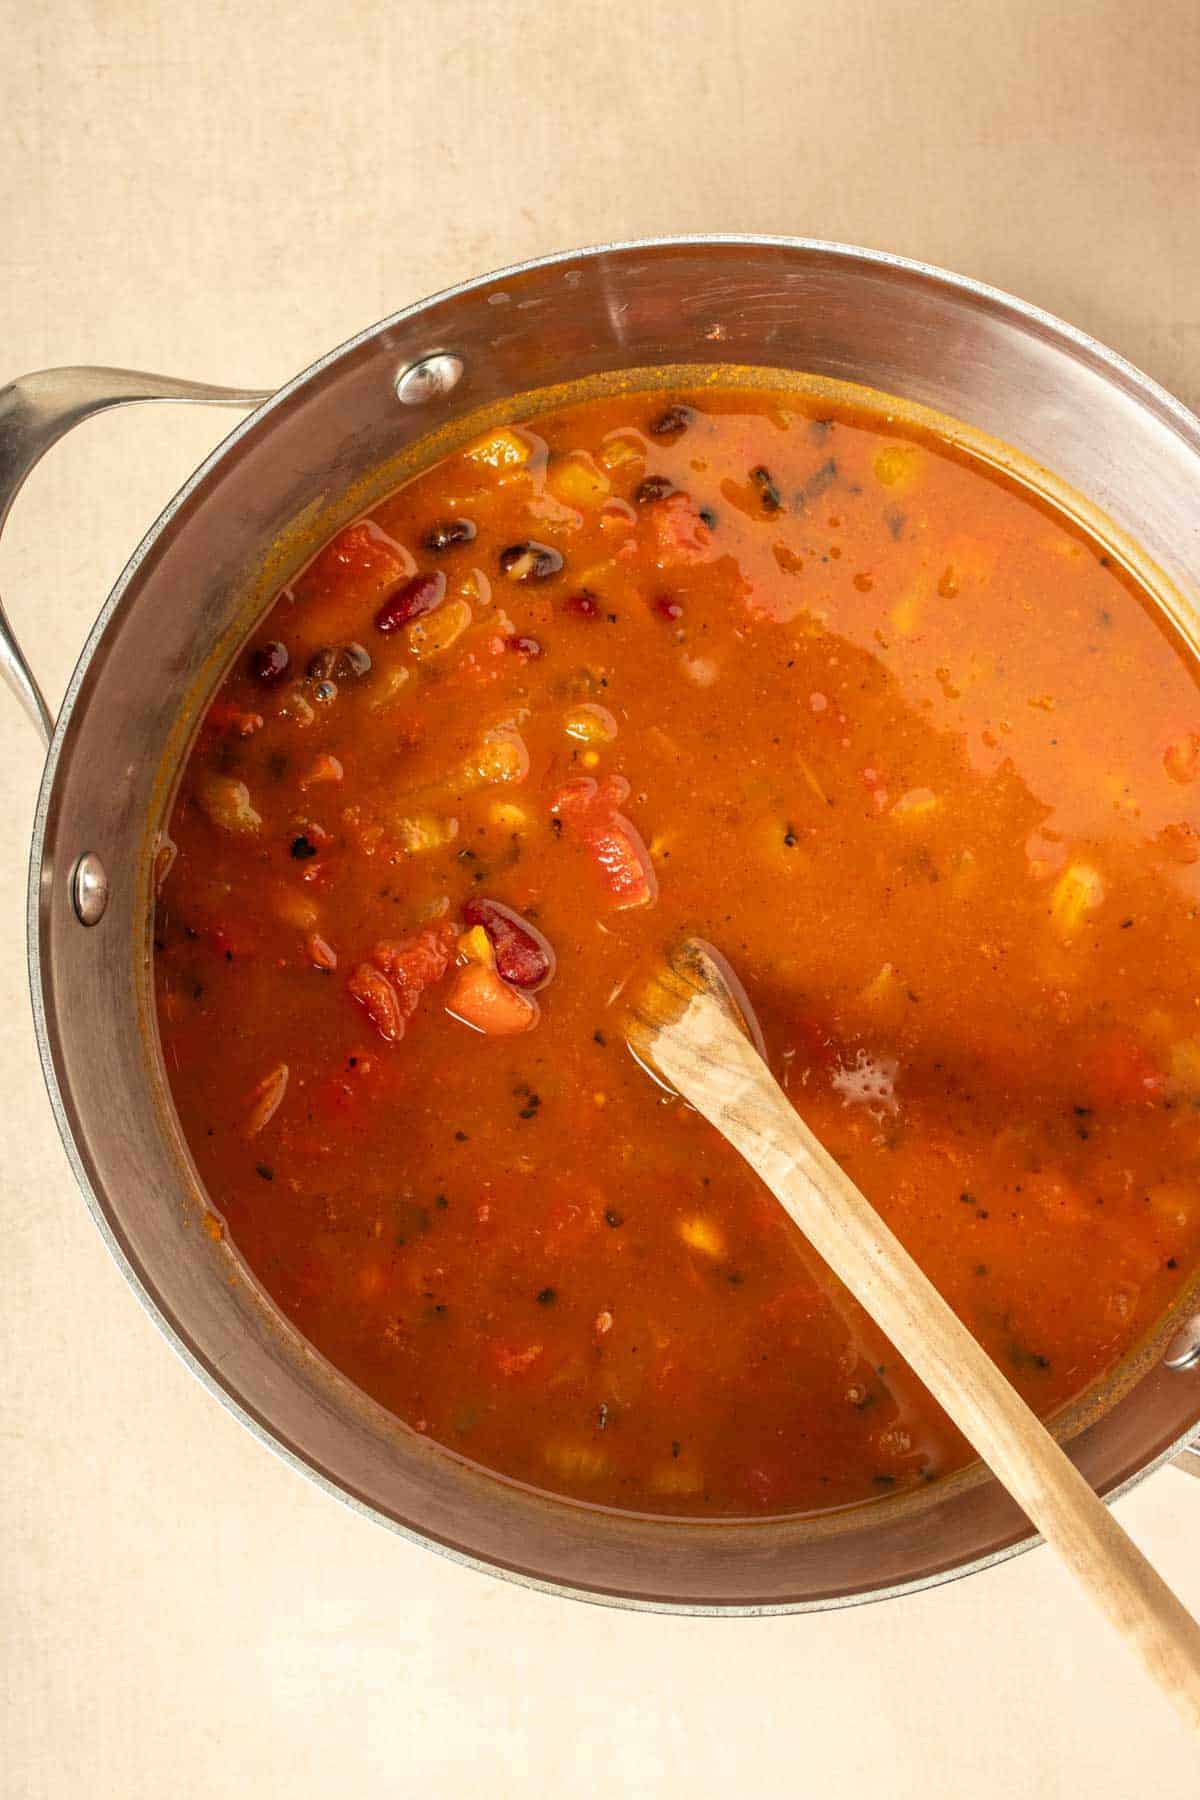
Simmer: I bring the chili to a gentle simmer and let it cook uncovered for 20-25 minutes. I stir occasionally and let it reduce slightly until it thickens to the consistency I like. If I want it a little thicker, I simmer it for a few extra minutes.

Finish & Serve: Right before serving, I stir in the apple cider vinegar. It adds the perfect finishing touch! I serve this warm!

My #1 Secret Tip for this recipe is to let it simmer uncovered!
One of the best ways to develop flavor and thicken your chili naturally is to let it simmer without a lid.
I keep the heat on medium-low and give it an occasional stir to prevent sticking. It allows the liquid to reduce and the spices to really come together for that hearty, comforting texture.
Other Tips To Keep In Mind:
- Chop All Veggies Before: I recommend prepping everything before you start cooking, and chopping all the veggies small and the same size. I like to measure out my spices into a small bowl ahead of time too, it keeps me from scrambling while the onions are sautéing.
- Want It Thicker? Let It Rest: After simmering, I let the chili sit for 5–10 minutes before serving. It naturally thickens as it cools slightly, and the flavors continue to deepen.
- Too Thick? Add Broth: If the chili thickens more than you’d like (especially after sitting in the fridge), just stir in a little vegetable broth or water when reheating to loosen it up.
- Saute Aromatics On Low: When sautéing the onions and garlic, I always start on medium-low heat. It’s tempting to crank up the heat to speed things along, but slow sautéing builds flavor without burning the aromatics. If your garlic browns too quickly, turn the heat down, it should smell fragrant, not sharp or bitter.
📖 Variations
One of the reasons I love this pumpkin chili is how easy it is to customize. You can change up the vegetables, boost the protein, or even tailor the spice level depending on who you’re feeding. Here are some of my favorite ways to switch things up:
Add Extra Vegetables: Really any veggies work in this recipe – if I’ve got produce that needs using, I toss it in! These work especially well: sweet potatoes, zucchini, spinach, corn, and mushrooms.
Add More Protein: To make this even heartier, I sometimes add chickpeas, white beans, lentils, or quinoa.
Add More Or Less Spice: If I’m making this for spice lovers, I add a pinch of cayenne pepper or diced jalapenos, or a little chipotle powder for smoky heat! Note: for a more kid-friendly or sensitive palate, I reduce the chili powder slightly and skip anything extra spicy.
🍽 Serving Suggestions
This pumpkin chili is hearty enough to stand on its own, but I love serving it with a few sides or toppings to turn it into a complete and satisfying meal.
If I’m serving this for dinner, I’ll often pair it with a batch of healthy cornbread for a classic comfort food combo! On lighter days, I’ll serve it with a kale salad or my roasted pumpkin salad.
For toppings, I like to set out a little chili bar so everyone can make it their own. Some of our favorites include: sliced avocado or guacamole, a dollop of vegan sour cream, shredded dairy-free cheese, tortilla chips, green onions, and a squeeze of lime!
🧊 Storage Directions
Refrigeration: Once the chili has cooled to room temperature, I transfer it to an airtight container and store it in the fridge. It keeps well for 3 to 5 days, and I just reheat it in the microwave or on the stovetop when I’m ready to eat.
Freezing: If I want to save it for later, this chili freezes beautifully! Once the chili has cooled completely, I pour it into a freezer-safe container, and I press a piece of parchment paper or plastic wrap directly on top of the chili before sealing the lid (this helps prevent freezer burn). It will keep for up to 3 months in the freezer.
Reheating: To reheat from frozen, I thaw the chili overnight in the fridge, then warm it up on the stove over medium heat or in the microwave in 30–60 second intervals, stirring in between. If it thickens a bit too much, I just add a splash of vegetable broth or water to loosen it up.
❓Recipe FAQs
Yes! Just keep in mind this will add to your prep time. I recommend roasting and pureeing the pumpkin until it’s smooth. You’ll need about 1¾ cups of puree to replace a 15-ounce can. I like to use sugar pumpkins or pie pumpkins for the best texture and flavor.
Yes! I sauté the onion, garlic, and peppers on the stove first, then transfer everything to the slow cooker. I cook on low for 6–8 hours or high for 3–4 hours. Add the apple cider vinegar just before serving.
Absolutely! I often chop the veggies and measure the spices ahead of time, then store everything in containers in the fridge until I’m ready to cook. The chili itself can also be made a day in advance and tastes even better the next day.

Love this plant based soup recipe? Please leave a 5-star rating 🌟 in the recipe below and/or a review in the comment section further down the page!
You can also FOLLOW ME on FACEBOOK, INSTAGRAM, and PINTEREST to see more delicious, healthy, family-friendly food, and if you have any questions, I’m here to help!